 how-to
Best Practices for Reconstituting Hydrophobic Research Peptides
Table of Contents
- Understanding Hydrophobic Peptide Reconstitution
- Solvents for Hydrophobic Peptides: Selection and Preparation
- Step-by-Step Reconstitution Protocol for Hydrophobic Peptides
- Peptide Solubility Troubleshooting: Common Problems and Solutions
- Storage of Reconstituted Peptides: Maximizing Stability
- Ensuring Reproducibility and Quality Control
- Frequently Asked Questions
Last Updated: September 19, 2026
Understanding Hydrophobic Peptide Reconstitution
Hydrophobic peptides present unique challenges during reconstitution because their nonpolar amino acid residues resist dissolution in aqueous solutions. Understanding the best practices for reconstituting hydrophobic research peptides, particularly the fundamental principles of solubilization, becomes essential for experimental success when working with lyophilized compounds.
The stakes matter. Poor reconstitution leads to:
- Incomplete dissolution (visible precipitate)
- Aggregation (peptide clumping into insoluble masses)
- Batch failure (wasted research time and budget)
- Unreliable downstream assays (noise in your data)
Solvents for Hydrophobic Peptides: Selection and Preparation
Choosing the right solvent system is where reconstitution either succeeds or fails. Water alone won't work. You need a combination approach that balances solubility with downstream compatibility.
Organic Co-solvents and Their Role
Co-solvents are organic compounds added to aqueous buffers to increase peptide solubility. They work by reducing the dielectric constant of the solution, which weakens water's hydrogen bonding network and allows hydrophobic peptides to dissolve.
The most common co-solvents are:
- DMSO (dimethyl sulfoxide) - The industry standard. Dissolves most hydrophobic peptides effectively at 10-50% concentrations. Excellent penetration into peptide aggregates. Start at 30% if your peptide resists dissolution at lower concentrations.
- Acetonitrile - Stronger solvent power than DMSO for some sequences. Use at 20-40% for hydrophobic peptides. Faster evaporation (both advantage and risk). Best for peptides with high phenylalanine or tryptophan content.
- Ethanol or methanol - Milder alternatives. Work best for moderately hydrophobic sequences. Less aggressive than DMSO or acetonitrile. Useful when downstream assays are sensitive to DMSO.
- Acetic acid - Often used at 0.1-1% as a pH adjuster and mild solubilizing agent. Helps protonate basic residues and reduce electrostatic repulsion. Particularly effective for peptides rich in lysine or arginine.
- Formic acid - Stronger acidic solvent for extreme hydrophobicity. Use at 0.5-2% in aqueous solution. Useful for peptides that fail to dissolve in DMSO-based systems.
Buffer Systems and pH Optimization: Residue-Specific Guidance
Once you've selected a co-solvent, pH becomes critical. The isoelectric point (pI) of your peptide determines the pH at which it has zero net charge and is most prone to precipitation.
| Peptide Composition | Recommended pH Range | Rationale |
|---|---|---|
| High in Phe, Leu, Ile (nonpolar, uncharged) | 3.0-4.0 or 7.0-8.5 | Charge from acidic or basic residues drives solubility; avoid neutral pH where charge is minimized |
| High in Trp, Tyr (aromatic, pH-sensitive) | 6.5-7.5 | Avoid pH >8.5 where tyrosine deprotonates and can oxidize; avoid pH <5.0 where tryptophan can protonate and aggregate |
| High in Lys, Arg (basic residues) | 4.0-6.0 | Keep pH below pKa of lysine (10.5) and arginine (12.5) so they remain protonated and positively charged, repelling each other |
| High in Asp, Glu (acidic residues) | 7.5-9.0 | Keep pH above pKa of aspartate (3.9) and glutamate (4.2) so they remain deprotonated and negatively charged |
| Mixed hydrophobic + charged residues | 1 unit away from calculated pI | Use pI calculator tools to determine exact isoelectric point, then select pH ±1.0 |
Practical pH selection workflow:
- Identify your peptide's amino acid sequence and calculate or obtain its pI (most peptide suppliers provide this in the Certificate of Analysis).
- Select a pH at least 1 unit away from the pI.
- If the peptide is rich in aromatic residues (Trp, Tyr), bias toward pH 6.5-7.5 to minimize oxidation risk.
- If the peptide is rich in basic residues (Lys, Arg), bias toward pH 4.0-6.0 to maximize protonation and charge repulsion.
- If the peptide is rich in acidic residues (Asp, Glu), bias toward pH 7.5-9.0 to maximize deprotonation and charge repulsion.
- Start with your calculated pH. If precipitation occurs, shift pH by 0.5 units in either direction and retry.
Common buffer systems and their typical applications:
| Buffer Type | pH Range | Best For | Notes |
|---|---|---|---|
| Phosphate-buffered saline (PBS) | 7.0-7.4 | Neutral hydrophobic peptides, cell-based assays | Standard choice; widely compatible with downstream assays |
| Acetate buffer | 4.0-5.5 | Acidic hydrophobic peptides, peptides with high basic residue content | Good buffering capacity in acidic range |
| Tris buffer | 7.5-8.5 | Basic or neutral sequences, enzyme assays | Excellent buffering; some enzymes prefer slightly basic pH |
| Formic acid / ammonium formate | 2.0-3.0 | Extreme hydrophobicity, peptides that fail in neutral pH | Use only if other buffers fail; verify downstream assay compatibility |
| Citrate buffer | 3.0-6.0 | Moderately hydrophobic peptides, pH range flexibility | Good alternative to acetate if acetate interferes with assay |
Step-by-Step Reconstitution Protocol for Hydrophobic Peptides
Following a consistent protocol ensures reproducibility across batches and experiments. Here's the proven sequence:
Handling Lyophilized Vials
Begin with the vial itself. Lyophilized peptides are extremely hygroscopic, they absorb moisture from air rapidly. Once you open the vial, degradation accelerates.
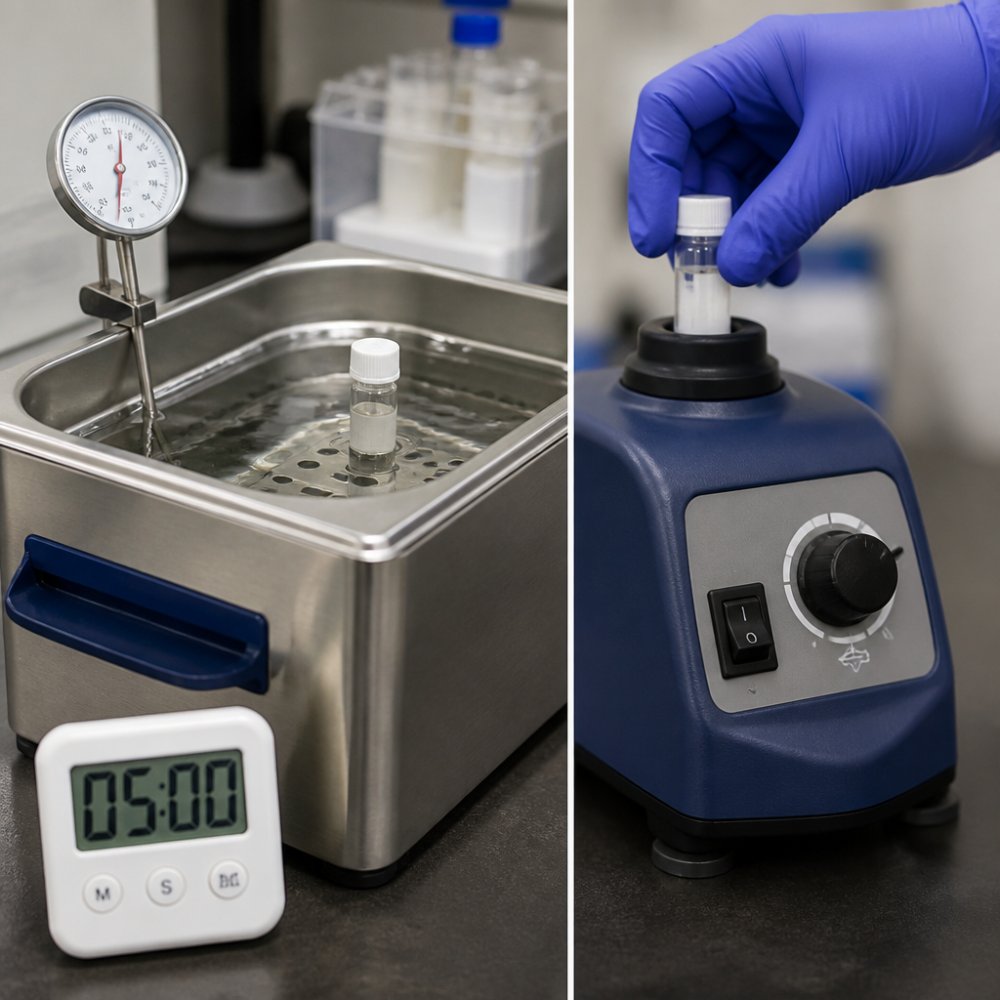
Sonication and Vortexing: Balancing Dissolution with Peptide Integrity
Mechanical agitation accelerates dissolution, but excessive force causes problems that aren't always visible until downstream assays fail.
How sonication works and when it causes damage:
Risks of over-sonication:
- Heat generation: Continuous sonication at high power can raise solution temperature by 5-15°C in minutes. Peptides containing methionine, tryptophan, cysteine, or histidine are particularly vulnerable to thermal oxidation above 30°C.
- Cavitation-induced oxidation: The shock waves from cavitation collapse create free radicals that attack aromatic and sulfur-containing residues, even in the absence of dissolved oxygen.
- Peptide fragmentation: Extreme sonication can break peptide bonds, especially in sequences with weak linkages or post-translational modifications.
- Aggregate formation: Paradoxically, over-sonication can create new aggregates by denaturing peptide structure and exposing buried hydrophobic regions.
Optimal sonication protocol:
- Use a sonication bath (preferred) rather than a probe. Baths deliver gentler, more uniform energy. If you must use a probe, use the lowest power setting (typically 20-30% amplitude) and keep the probe tip 1-2 cm from the vial.
- Sonicate for 10-15 minutes maximum in 5-minute intervals. Between intervals, remove the vial and let it cool to room temperature (check by touch, it should feel cool, not warm).
- Monitor temperature: If the vial feels warm after 5 minutes, stop and cool before continuing. Do not exceed 30°C.
- Stop sonication as soon as the solution clears. If the peptide dissolves after 8 minutes, do not continue to 15 minutes. Excess sonication provides no benefit and increases oxidation risk.
- For peptides containing oxidation-sensitive residues (Met, Trp, Cys), consider nitrogen-purged sonication: Bubble nitrogen through the solution for 2 minutes before sonication to displace dissolved oxygen, then sonicate in a sealed vial to prevent re-oxygenation.
Visual and tactile indicators that you've over-sonicated:
- The vial is noticeably warm to the touch (>30°C)
- The solution has changed color (browning or yellowing indicates oxidation)
- Foam or bubbles persist in the solution after sonication stops (sign of cavitation damage)
- The solution becomes cloudy or turbid after initially clearing (new aggregates forming)
Vortexing: The gentler alternative:
Optimal vortexing protocol:
-
Vortex in short bursts: 5-10 seconds at a time, at medium speed (typically setting 5-7 on a standard vortex mixer). Do not vortex continuously for more than 30 seconds.
-
Pause between bursts: Allow 30-60 seconds between vortex bursts for the solution to equilibrate and any foam to settle.
-
Avoid introducing air: Vortexing creates bubbles that increase surface area for oxidation. If foam forms, let it settle before proceeding. Do not vortex with the vial cap loose.
-
Vortex in the correct orientation: Hold the vial upright (not at an angle) to minimize air incorporation.
-
Add co-solvent to the vial (do not add buffer yet)
-
Vortex gently for 10 seconds at medium speed
-
Let sit for 2 minutes at room temperature (allows co-solvent to penetrate peptide aggregates)
-
Sonicate in a bath for 5 minutes at moderate power
-
Remove vial and inspect: Is it clear? If yes, proceed to step 7. If no, continue to step 6.
-
Vortex for 10 seconds, then sonicate for another 5 minutes (total 10 minutes maximum)
-
Let sit for 5 minutes at room temperature (allows solution to cool and stabilize)
-
Add buffer slowly (over 1-2 minutes) while vortexing gently at low speed
-
After buffer addition, vortex for 10 seconds and inspect for cloudiness
Troubleshooting mechanical agitation problems:
- Peptide won't dissolve even after 10 minutes of sonication: The co-solvent concentration is too low or the pH is wrong. Stop agitation, adjust co-solvent or pH, and retry.
- Solution is clear after sonication but becomes cloudy after buffer addition: The buffer pH is too close to the peptide's isoelectric point. Adjust pH by 0.5 units and retry.
- Solution smells like burnt plastic or has a chemical odor after sonication: Over-heating or oxidation has occurred. Discard and restart with fresh peptide and lower sonication power.
Peptide Solubility Troubleshooting: Common Problems and Solutions
Even with proper technique, problems occur. Here's how to identify and fix them.
Visual Indicators of Failed Reconstitution
Cloudiness or turbidity - The solution appears milky or hazy. This indicates incomplete dissolution or fine precipitate suspended in solution. The peptide is not fully solubilized.
Compatibility with Downstream Assays
Your reconstitution solvent must not interfere with your assay. DMSO, for example, can quench fluorescence in some assays or inhibit enzyme activity in others.
Before committing to a full reconstitution:
- Test a small aliquot in your assay system to confirm compatibility
- Know your assay's solvent tolerance - ask the assay kit manufacturer what co-solvent concentrations are acceptable
- Plan dilution steps - if your assay requires <5% DMSO but your reconstitution uses 50% DMSO, you'll need to dilute the stock solution before use
Common incompatibilities:
- DMSO inhibits many proteases and kinases
- Acetonitrile interferes with UV absorbance at 280 nm
- Acetic acid can lower pH unexpectedly in buffered assay systems
Storage of Reconstituted Peptides: Maximizing Stability
Once reconstituted, your peptide begins degrading. Proper storage slows this process dramatically.
Temperature and Environmental Conditions
Freezing is your best option. Store reconstituted peptides at -20°C or -80°C. At -20°C, most peptides remain stable for weeks to months. At -80°C, stability extends to a year or longer.
Preventing Degradation and Contamination
Oxidation is the primary degradation pathway for hydrophobic peptides. Methionine oxidizes to methionine sulfoxide, altering the peptide's properties (Oxidation of Methionine Residues in Polypeptide Ions via Gas-Phase Ion/Ion Chemistry). Tryptophan and tyrosine undergo photodegradation.
Ensuring Reproducibility and Quality Control
Reproducibility depends on consistency. Small variations in technique compound across experiments and destroy your ability to trust results.
Keep a reconstitution log. Record:
- Peptide name, sequence, and batch number
- Vial weight and appearance at opening
- Solvent composition and volumes used
- Reconstitution date and time
- Any deviations from protocol
- Visual observations (color, clarity, precipitation)
- Final concentration (measured or calculated)
Frequently Asked Questions
What are the best solvents for hydrophobic peptides?
Hydrophobic peptides typically require a combination of aqueous buffer and organic co-solvents. DMSO is widely used because it penetrates cell membranes and dissolves hydrophobic residues effectively. Acetonitrile and acetic acid are also common choices. The optimal solvent depends on your peptide's sequence and downstream applications. Start with 30-50% DMSO in aqueous buffer, then adjust based on solubility. Always verify solvent compatibility with your assay before committing to large batches.
How do you know if a peptide is hydrophobic?
Hydrophobic peptides contain a high proportion of nonpolar amino acids such as leucine, isoleucine, valine, phenylalanine, and tryptophan. You can estimate hydrophobicity using the peptide sequence and online prediction tools, or check the Certificate of Analysis from your supplier. Visual signs during reconstitution include cloudiness, precipitate formation, or slow dissolution even with vigorous mixing. If your peptide fails to dissolve in standard aqueous buffers, hydrophobicity is likely the cause.
How should hydrophobic peptides be stored after reconstitution?
Store reconstituted hydrophobic peptides at -20°C or -80°C. Use sterile, sealed containers to prevent bacterial contamination and freeze-thaw cycles, which accelerate degradation. Aliquot stock solutions into smaller portions so you only thaw what you need. Protect from light and store away from temperature fluctuations. Document storage conditions and preparation dates to track stability. For maximum shelf life, some researchers add glycerol or BSA as stabilizers.
Can you use sonication to dissolve hydrophobic peptides?
Yes, sonication is an effective technique for hydrophobic peptide reconstitution. Ultrasonic energy disrupts molecular aggregates and improves solvent penetration. Use 30-60 second bursts with 30-second rest periods to avoid overheating, which can cause degradation. Monitor the vial temperature and do not exceed 30°C during sonication. Combine sonication with vortexing for best results. Always verify that sonication does not damage your specific peptide by testing a small aliquot first, especially if your peptide contains sensitive functional groups.